Browser Controls are controls which make it possible to view data directly from the Internet.
- To open Browser Controls, click the
 icon, enter POS Interface Profile List, and select the relevant link.
 - Locate your Interface Profile.
- Click Lists - Browser Control List (or Related - Browser Control List).
Tip: A quicker way is to open the POS Browser Control List directly, but then for a new profile you have to enter the Interface Profile ID manually.
The Demo Data Company has a few Browser Controls that are used by the POS.
Browser Control Card
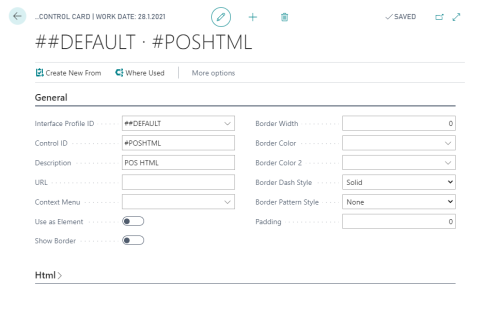
Browser Control #POSHTML – HTML information for items
For the Retail Item, you can define extended item information as Item HTML, with formatted HTML text and images. The information is stored as a blob in the database, and the images can be stored internally in the blob or externally with a reference. The extended item information can be displayed externally ( for example in Web Stores) or on the POS.
To display HTML information for items in the POS the following must be defined:
-
Retail Items must have HTML information specified.
- Open your item's Retail Item Card.
- Click Related- Master Data - Item HTML.
- Enter your HTML information for the item.
Note: You have a preview of the data at the bottom of this page.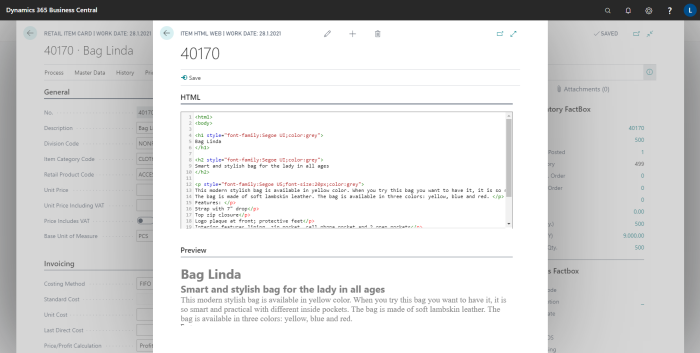
-
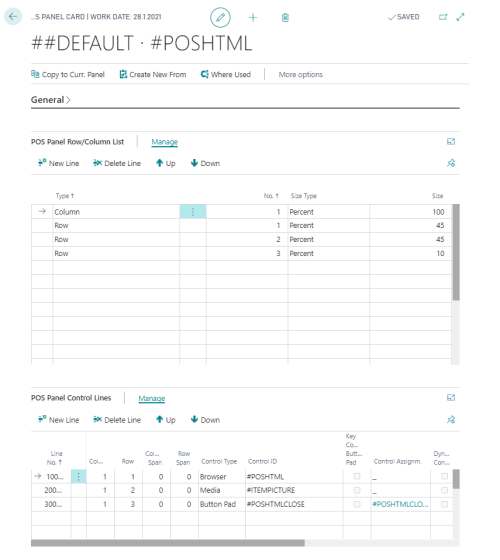
Next step is to have a POS Panel with ID #POSHTML:
- Note: This Panel ID is a fixed name.
- You must set the Browser Control ID #POSHTML as one line on this panel to display the HTML information.
- Media Control is here to display the retail item's image. This is optional.
- Button Pad #POSHTML CLOSE is here to have the CLOSE button in the window.
- The following is an example of panel #POSHTML:
- On the POS Terminal Card, the General Fast tab, select the Show Item Html check box.
-
The Data Grid #JOURNALGRID for your POS must have the following setting:
- Select the Notify Data Row Double Click and Notify Data Row Selected check boxes in the General Fast Tab:
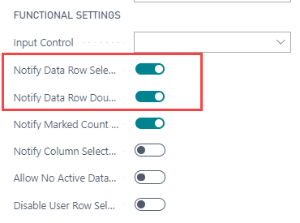
- Select the Notify Data Row Double Click and Notify Data Row Selected check boxes in the General Fast Tab:
-
When all the setup has been done, you can view the extra description on the POS for items that have HTML information:
-
In the POS, sell some items, and when required, select (double-click) the Item line and the panel #POSHTML opens automatically:
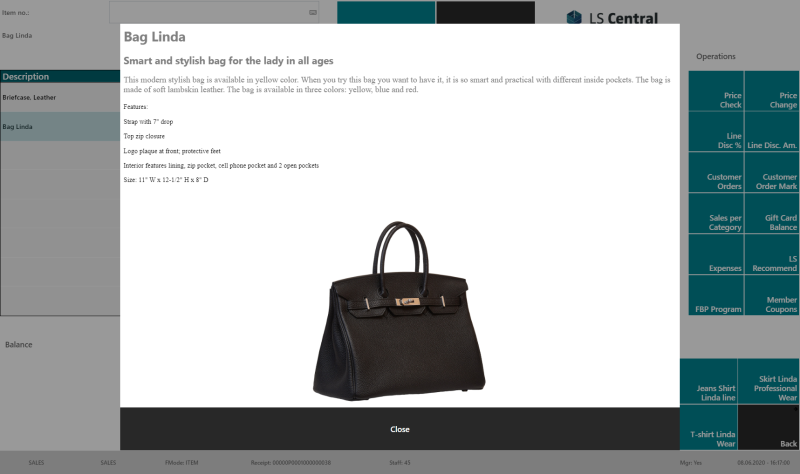
Note: Remember that if the selected retail item does not have any information in Item HTML, the panel will not open, nothing happens in the POS.
-
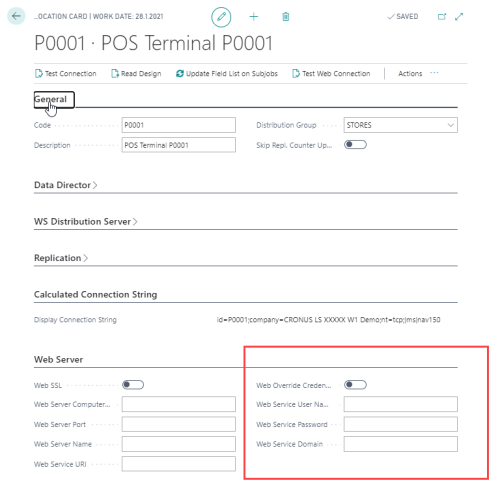
Media and Browser Control (Web Service) authentication
An additional step is required if the service tier is being accessed with NavUserPassword authentication.
You must specify a user name and password in the Distribution Location page for each terminal that has item pictures or item HMTL enabled:
- Open the POS Terminal Card.
- Click Related - Distribution Location for the terminal.
- In the Web Server FastTab, enter the user name and password: